Archive

Migrate WordPress Site using Migrate Guru complete guide

Moving a website from one place to another place can be a difficult process. The main difficulty during this task is the risk of losing data. this article is about Migrate WordPress Site using Migrate Guru. WordPress is one of the most used CMS and the process of migrating a WordPress site from one place to another is now made easy with the use of different plugins and techniques. A WordPress website consists of files and a database, both of which need to be set up to talk to each other in the correct way.

Migrate Guru is a plugin that makes the migration of the site from one server to another very easy. Migrate Guru will transfer a site quickly, requires minimal knowledge. You did not need to worry about any database, data, and files loss. In this article, we mention Migrate WordPress Site using Migrate Guru

Table of Contents

  1. Installation Of Migrate Guru
  2. Migrate Guru Features
  3. Setup on Remote Server
  4. Move Website using Migrate Guru

Installation Of Migrate Guru

You can install Migrate Guru from the WordPress admin Dashboard, Plugin section. And also you can install it manually. We mention both methods below.

Install Automatically:

  1. Go to the Plugin section on WordPress admin Dashboard.
  2. Search the Migrate Guru in search box.
  3. Click the install button and activate to use.

Install Manually:

  1. Search Migrate Guru in any search engine or click here.
  2. On this page click Download button and download the zip of plugin
  3. Upload this plugin in plugins and active it.

Migrate Guru Features:

Fast One-click Migration

Using Migrate Guru you can move your site quickly and with one click. Let you have a 1GB of the site you can clone or migrate it less than 30 minutes. Just enter host details and click ‘Migrate’. If you entered the details right it will be done in just a few minutes.

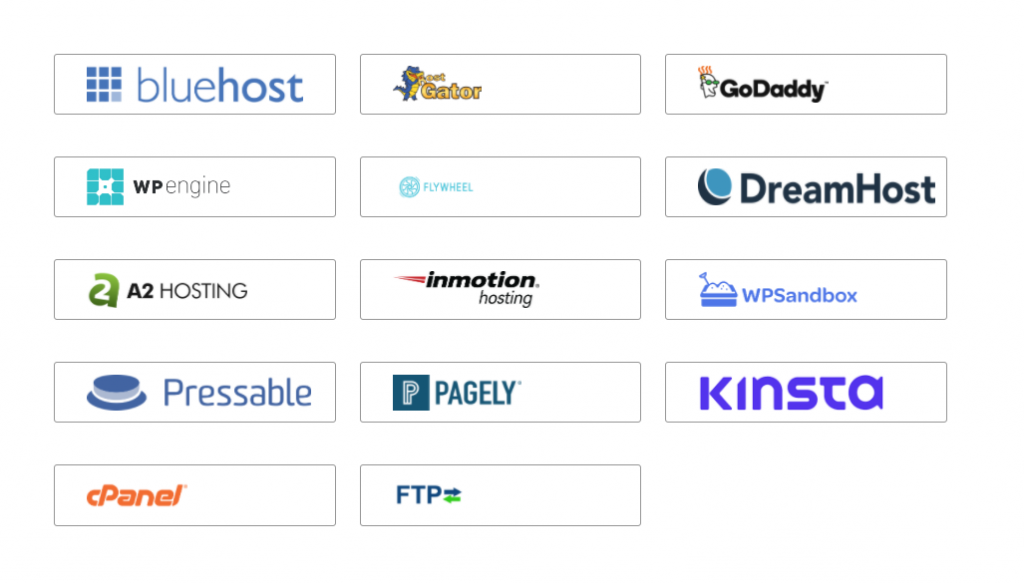
Compatible with almost every Web Host

Migrate Guru has a large number of web Host option. Move your site from and to any web host.
Migrate WordPress Site using Migrate Guru

No Overload On Site

When you start the migration of your website the plugin will monitor the server resources ensuring that it does not overload until the site migration is completed.

Built For Large Sites

Migration Guru works for large sites. Move or clone sites as large as 200 GB in a breeze. Large site migrations usually fail because of live-site server import limits.

No Space Required

You do not need any extra space for migration. Migrate Guru automatically copies your site to our servers. After the migration is complete, the copy is erased.

Fully Automatic, Built-in Search

Comfortably handle serialised data with accurate Search & Replace.

Timely Alerts

Sit back. Relax. Our real-time & email alerts will keep you up to date with the website migrate status.

Setup On Remote Server

There are some steps to do on the remote server before doing migration.

Create your Site:

Before transferring the site first create the site on required server with the same name and credentials. Once your site is created move to next step.

Install WordPress

Install WordPress on the newly created website. Complete the setup of WordPress installation. Fellow the video guide to complete the setup.

Move Website using Migrate Guru:

Fellow the steps to move your site:

After installing Migration Guru plugin click on the migration guru in the left menu you can see dashboard

image 50

Provide Email and agree the agreement. After providing all information click on the Migrate button.

image 51

Select your host from all these host listed on the screen.
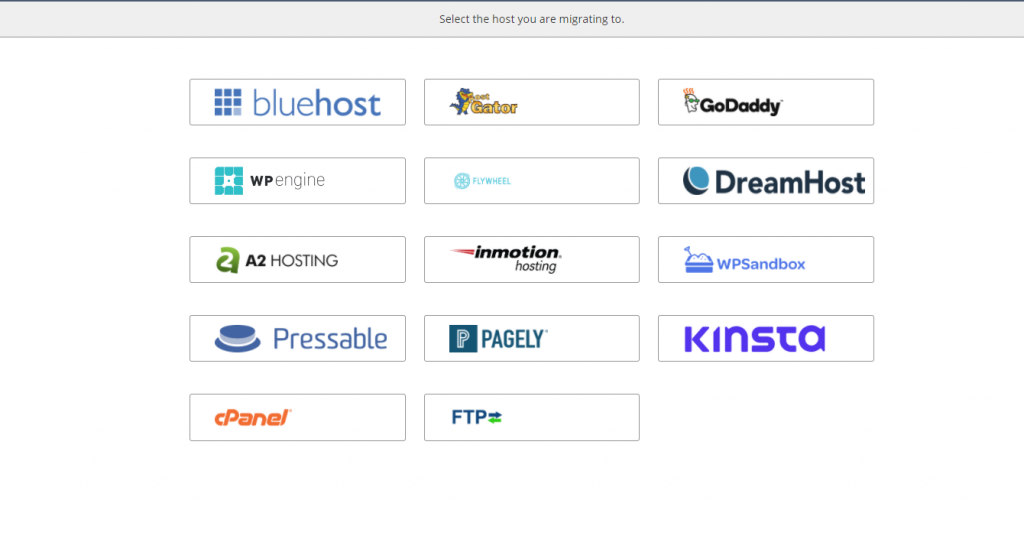
image 52

For this tutorial we are using FTP to transfer site. Provide the required information in the from.

image 54

After providing all this information click the migrate button.

image 55

if all information is true you can see the migration process.

image 56

After successful migration of site you can see the screen showing success massage. and also you will receive a email regarding the completion.

image 57

How to transfer a website from cPanel to CyberPanel manually

cPanel is one of the most papular web hosting control panel, which helps to manage websites. CyberPanel is an emerging web hosting control panel also use to manage websites. In this article, we will discuss how you can transfer a website from cPanel to CyberPanel manually. This is very important to know if you want to move your site from cPanel to CyberPanel.

CyberPanel also has a one-click importer. Use our guide if for some reason one-click importer fails to import your site (which happens rarely in case your database is very large)


Table of Contents

  1. Download Files from cPanel
  2. Export Database from cPanel
  3. Create a website in CyberPanel
  4. Upload Files on CyberPanel
  5. Create a Database in CyberPanel
  6. Change DNS
  7. Alternative Transfer Method

Transfer a website from cPanel to CyberPanel

1. Download Files from cPanel:

Here are some steps to download files from cPanel:

1.1 Login to cPanel:

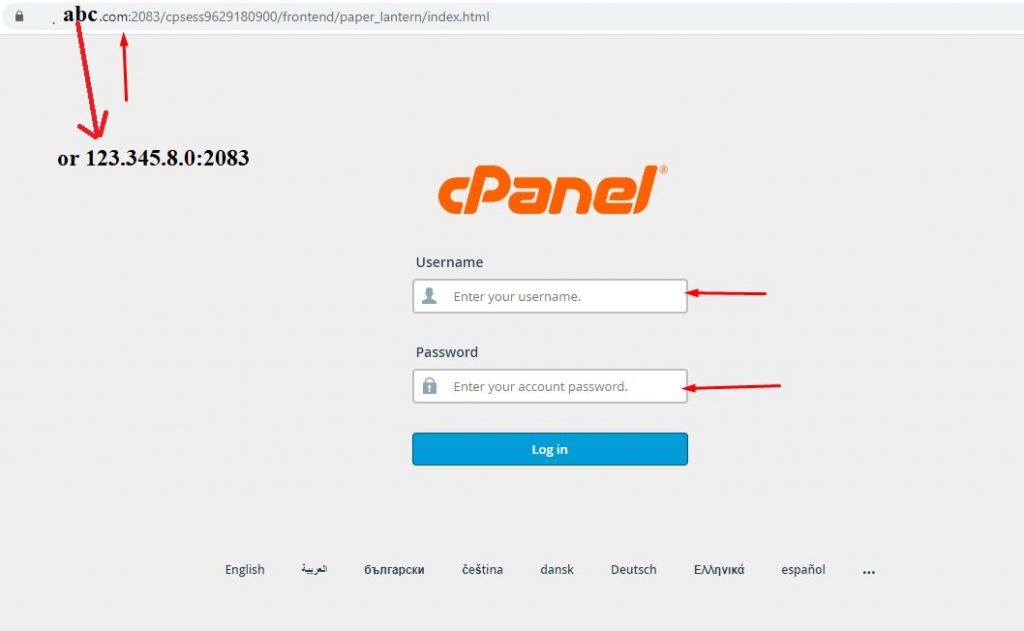
The first step in moving/tranfering a site from cPanel to CyberPanel is to log in to your cPanel account using your credentials. Login to cPanel is required for next steps.

Go to your site cPanel address

cPanel LogIn

1.2 Compress Files in cPanel:

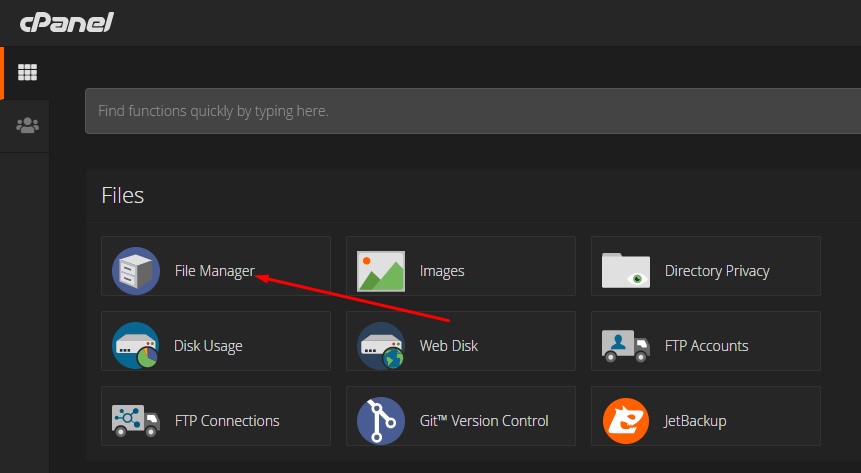
After logging in, go to the cPanel File Manager option in the cPanel dashboard.

File Manager cPanel

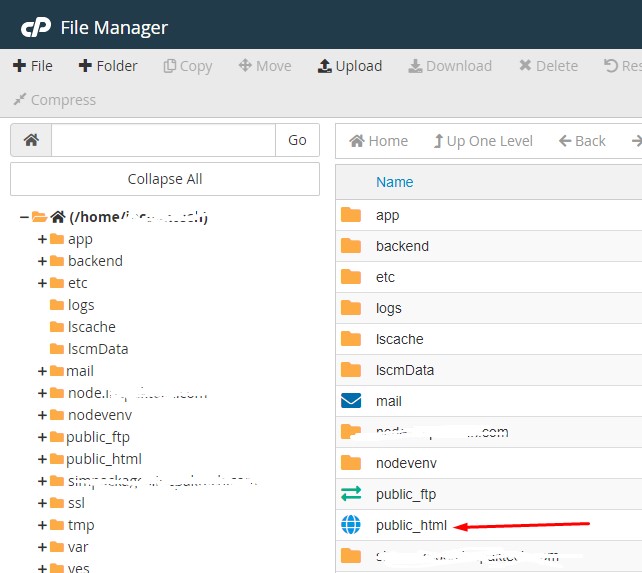
Open the file manager, then select the public_html folder and open it.

Public html floder

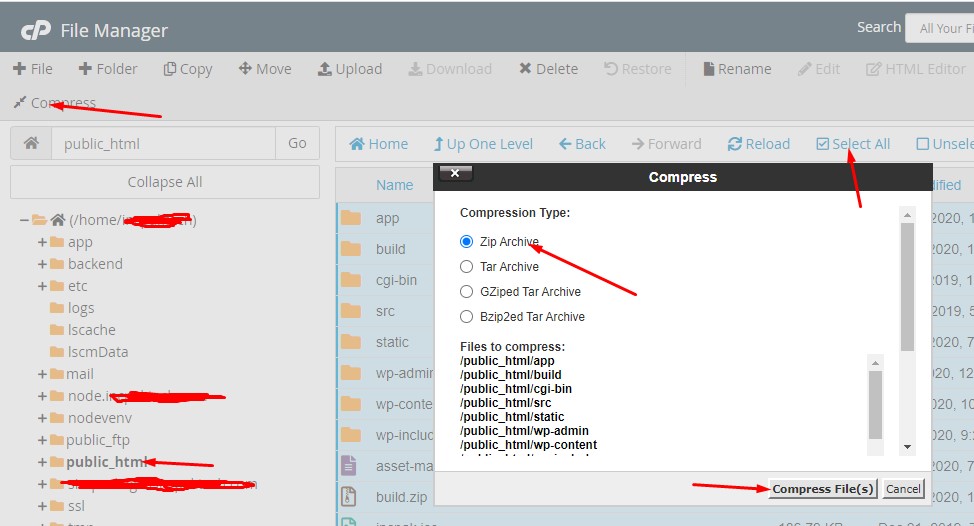
Select and compress all the files present in Public_html folder.

compressed files in public html

1.3 Download the compressed file

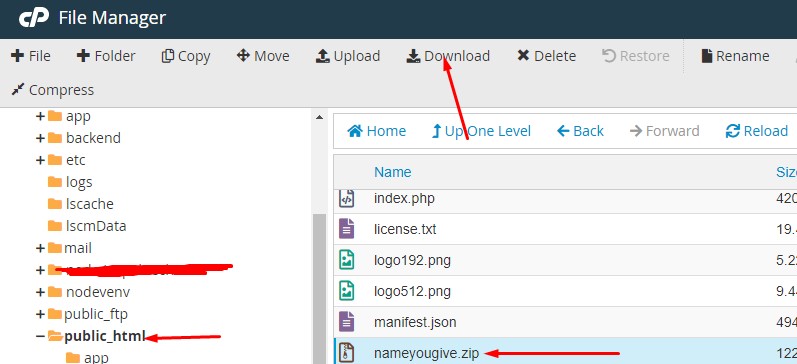
A compressed file is present in the public_html once compression is completed. Select this file, and download it on your local computer. If the file is large and you have a slow internet connection we’ve mentioned a few ways in step 7 as to how you can easily transfer this file without locally downloading the file.

download compressed file

2. Export Database from cPanel:

A database is the most important part of any site. Each site relies on its own database for internal links, responses, and other features.

To import Database from cPanel follow these steps:

Log in to the system using the credentials described in the last step.


2.1 Open PHPMYAdmin:

Check PHPMyadmin Option in the cPanel Dashboard and open it.

PhpAdmin on cPanel

Once you click on the PHPMyAdmin option. A dashboard will open from where you can select and export your database.

phpmyadmin dashboard

2.2 Export Data Base:

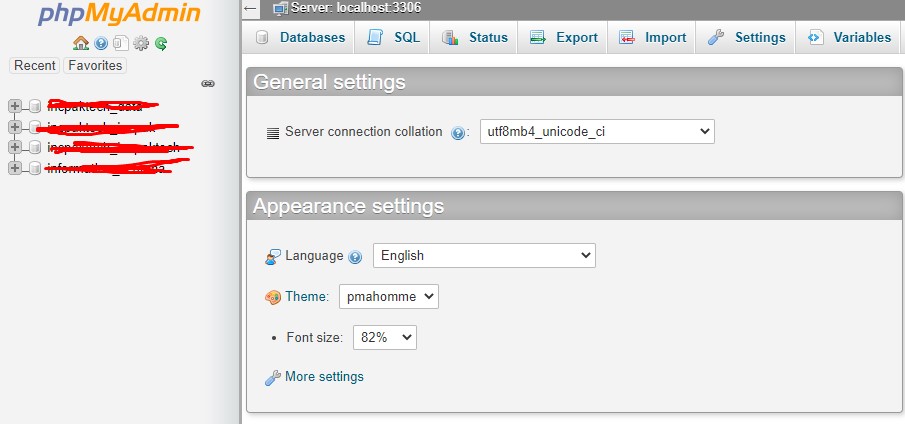
Once you are in the PHPMyAdmin Dashboard, select the database related to your website and click on the Export option.

exporting database

Note: Select the file type zip or MySQL when you want to export.

The exported database will save a compressed database file to your local computer.


3. Create a Website on CyberPanel:

Here are the steps to create a website on CyberPanel:

3.1 Login to CyberPanel:

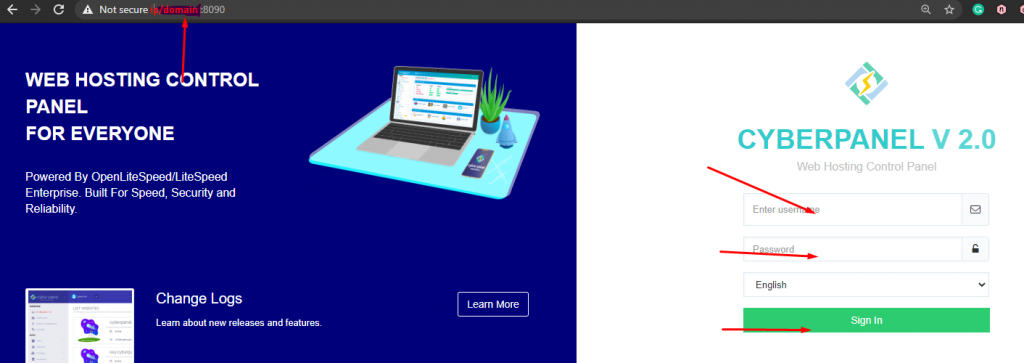
Like cPanel, you must first access your CyberPanel using your credentials to log in. To do this, look at the URL of your CyberPanel. It displays a screen for logging in. Provide the required username and password and access the dashboard.

Cyber Panel Login

3.2 Create a Website:

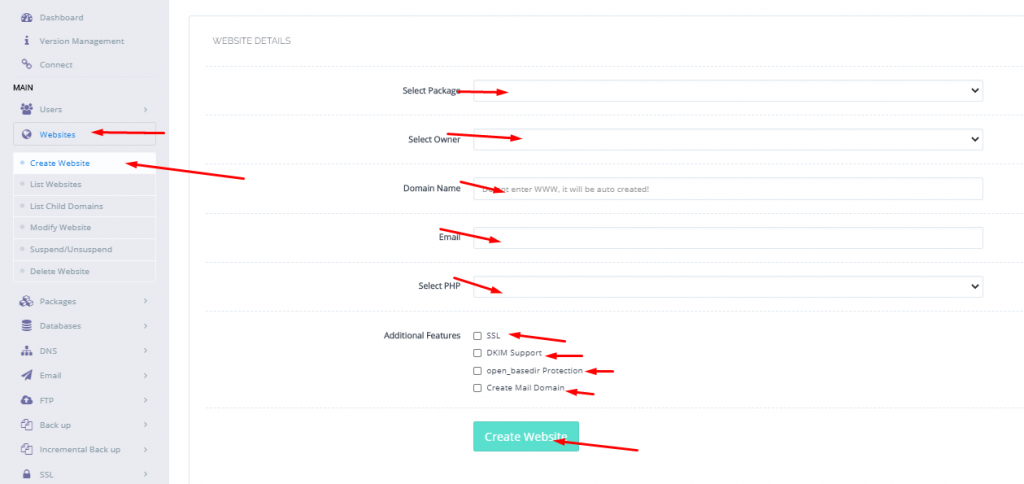
After logging in, click on the Website -> Create option on the left menu or on the dashboard of CyberPanel. Then provide the information to create the site. Provide the exact URL of the site when you are creating the site.

Create website in cyberpanel

4. Upload content on CyberPanel

Once you have completed the website creation process. Now it’s time to upload the content that is exported from the cPanel. Basically the compressed file you got from the File manager -> Public_html in cPanel.

4.1 Mange Website:

Go to the Website -> List Websites. Here you can see a website that you have already created. On the right side of this website, you can see a manage button. Click on it to open the Website Management Dashboard.

Manage Websites

4.2 Upload and Extract Content:

Once you get the website Management Dashboard.

Check the file manager option on the website manager dashboard.

file manager

Open the file manager and here you will find the public HTML folder. Open this folder.

public html

Upload that compressed file download from cPanel to your computer.

Upload record

Once the file is uploaded, extract the file to retrieve content from it.

extract file

5. Create a Database in CyberPanel:

After uploading content. It is important to create a database that solves content issues.

5.1 Create Your data base:

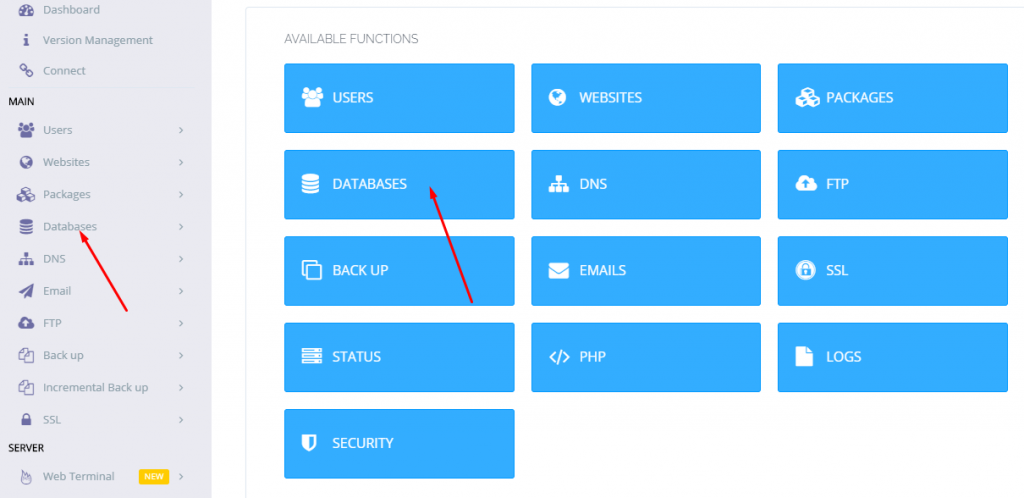
Click The Database button on Dashboard or in the left Menu:

image 4

In next Step Click On create database option:

image 5

Select the domain you added in last Step.

image 6

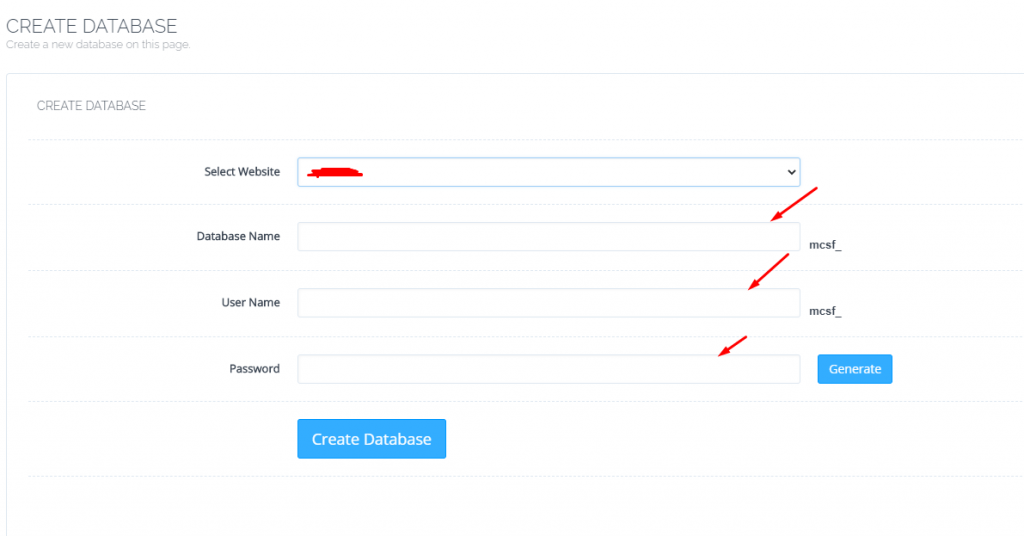
Provide the required information and click on Create Database button.

image 7

5.2 Login to PHPMyadmin:

Get access to PHPmyadmin goto Databases -> phpMyadmin in CyberPanel Dashboard.

image 8

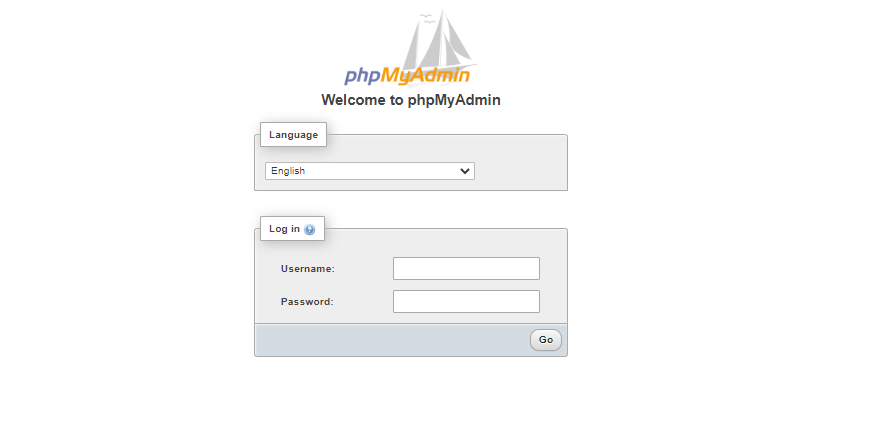
Provide the credentials that are required to access.

login phpmyadmin

5.3 Import DataBase to CyberPanel:

After creating the database. Go to Import Option, then select the file that is exported database file from cPanel. Click the Go button at the bottom right of the page.

Transfer a website from cPanel to CyberPanel

6. Change DNS

If you are using the cPanel DNS then follow this tutorial link below

If you are using any other DNS provider, then go to the DNS provider platform and change the IP of cPanel with the IP address of CyberPanel. In the DNS section, there is a record section replace old IP with new IP. Replace the both with @ and without.


 7. Alternative Transfer Method

In the case of large data on cPanel, you can use an alternative method of migrating websites from cPanel to CyberPanel.

7.1 Transfer Using wget:

  1. Compressed the data present in the Public HTML folder of cPanel.
  2. Get the address of that compressed data on cPanel.
  3. And Download or get the data on the CyberPanel server by using wget Command.
 $ wget <cpanle-file-address>

7.2 Transfer Using rsync:

By using rsync command you can copy and synchronize your data remotely and locally. You can copy or synchronize data from server to server.

  1.  Install rsync on your Linux server by using following commands
$ yum install rsync (On Red Hat based systems) like: Centos 
$ apt-get install rsync (On Debian based systems) like: Ubuntu

7.3 Basic Syntax

$ rsync options source destination

7.4 Copy/Sync Files and Directory to or From a Server

$ rsync [-options] [email protected]:SOURCE DESTINATION

Note: Use these alternative if you have large amount of data to transfer.

Read More: HOW TO CHANGE TIMEZONE ON LINUX SERVER

Follow US on Facebook / Twitter  for update.