Archive

How to enable full/advanced WordFence protection on OpenLiteSpeed

Website security is always a fundamental and important part of any website especially WordPress. Today we will see how to enable full/advanced Wordfence protection on OpenLiteSpeed.

If you are using LiteSpeed Enterprise you don’t need to do anything as it is fully Apache compatible so Wordfence full protection will work out of the box. So you can stop now and enjoy your coffee.

However, if you are using OpenLiteSpeed then go ahead, make sure to use OpenLiteSpeed with CyberPanel, and ease your life.

What is WordFence?

Wordfence is one of the most popular WordPress scanner and firewalls. Wordfence comes in both free and premium versions. Wordfence has enough features to secure your websites like endpoint firewall, malware scanner, malicious IP addresses detection, 2FA, and all. In short, Wordfence is the most comprehensive WordPress security solution available. Wordfence is enough to secure your site.

Why do we need to configure OpenLiteSpeed for full Wordfence protection?

Setting up WordFence is a bit tricky in the case of OpenliteSpeed. With OpenLiteSpeed, you have to do some manual settings. In this article, we will discuss how to configure Wordfence with OpenliteSpeed to enable advanced firewall options.

Enable full Wordfence protection on OpenLiteSpeed:

  1. Install Wordfence on your WordPress site.
  2. Edit Vhost Configuration for Wordfence.
  3. Enable full Wordfence protection with CyberPanel.

Install Wordfence on your WordPress site:

The installation of Wordfence on your WordPress site is just like the installation on any plugin. Follow along the steps to install Wordfence.

Setp 1: Install Wordfence Plugin:

To install WordFence on your WordPress site first log in to your admin dashboard:

Go Plugins->add New

advanced wordfence protection on openlitespeed

Now search Wordfence in the search bar, You will receive the results for Wordfence select the first one (The one with the Wordfence logo) and Click install.

image 64

Setp 2: Setup Wordfence Plugin:

Once installation is done click Activate to activate the plugin:

image 65

After activation, they will ask you for an email address where they sent you emails regarding your website. Provide your email, click yes if you want to receive emails, check the box for agreement and press continue.

image 67

If you have a premium version enter the key here otherwise click on thanks and use the free version.

image 68

Now your Wordfence is installed and good to go. You can see the Wordfence on the left menu. When you click that you will see a notice to configure full/extended Wordfence protection.
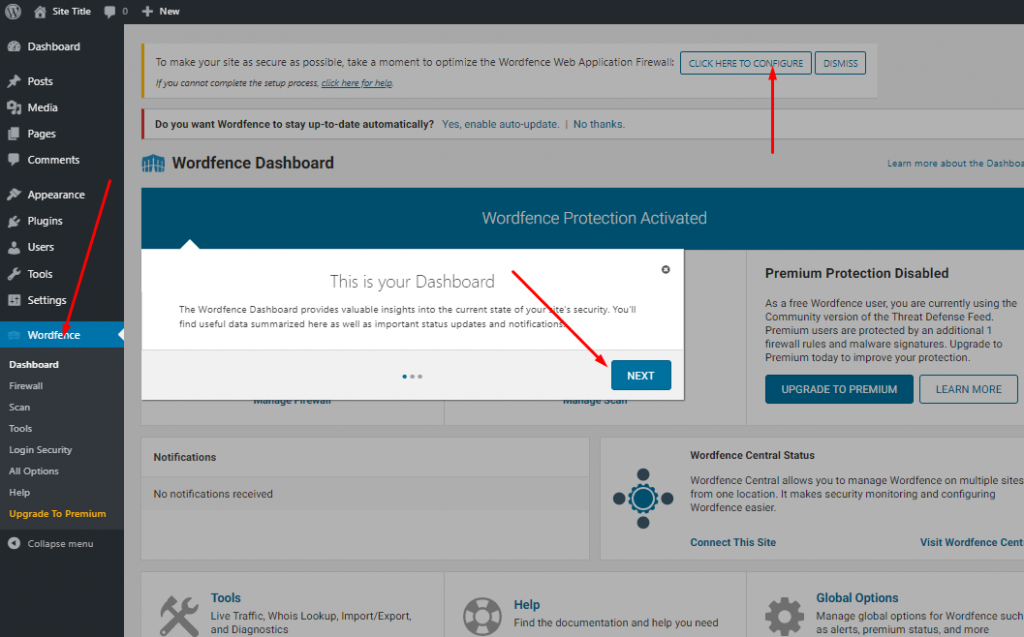
image 69

Once you click the configuration a prompt appears that asks to download the .htaccess file. Click on download and press continue.

image 70

In the case of LiteSpeed Ent. configuration is done out of the box but in the case of OpenLiteSpeed, we’ve to perform some additional steps that we will discuss below. I found an official video guide for you to install Wordfence you can check that also.

Edit Vhost Configuration for Wordfence:

For OpenLiteSpeed you have to configure the Wordfence to enable Advanced WordPress Protection. Without setting these configurations to OpenLiteSpeed you can see that there is the Basic WordPress Protection.

image 71

To enable the advanced protection you have to access the OpenliteSpeed web server dashboard by navigating https://<your_ip>:7080. In the OpenLiteSpeed web, server Dashboard go to the VHost -> General

image 72

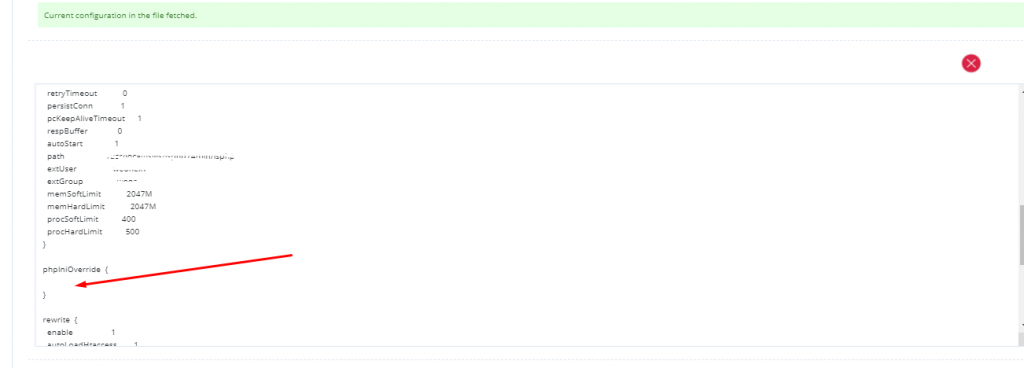
Go the end of page you will find the php.ini overwrite click the edit button.

image 73

add this to php.ini overwrite

php_value auto_prepend_file /path/to/wordfence-waf.php

Most Common path if you created site from cyberpanel

php_value auto_prepend_file /home/example.com/public_html/wordfence-waf.php

If you added the domain with CyberPanel then first you have to find the path of the wordfence-waf.php file. After adding this graceful restart the OpenLiteSpeed with this server did not get the changes.

image 74

Once done go back to your WordPress site and check the firewall you can see the Extended Protection level there.

image 75

Instead of doing this from the OpenLiteSpeed, you can install CyberPanel on your OpenLiteSpeed server, and then there is an easy way to do this. I will describe that in the next step.

Enable advanced firewall with CyberPanel.

When you have the CyberPanel installed on your server to manage your site you can follow the guide stated above but in this part of the article, I will tell you a simple way to do this using CyberPanel. To enable an extended or advanced level of protection using CyberPanel, you have to log in to CyberPanel using your credentials.

From you CyberPanel Dashboard go to the Websites ->list websites

image 76

You can see all of your websites there Click on the Manage button. To open the website dashboard.

image 77

Once the manage Dashboard for the web site is opened go to the configuration part and click the VHost

image 78

Go to the php.ini section

image 79

Add the following line to enable the extended protection.

php_value auto_prepend_file /home/example.com/public_html/wordfence-waf.php 

Now your extended protection is enabled .

image 81

Follow US on Facebook / Twitter  for update.

How to solve the redirection error of your hacked website and, how to get back your hacked website

Are you facing a redirection error? Your site is redirecting to some spam URLs? When you want to access your site and suddenly you see that your site is navigating to somewhere else. Do you want to solve the redirection error? Honestly, I can tell you that it’s a very hard and time-consuming process to find where the issue is. It does not happen automatically its often happens when some hacker gains access to your site and adds spam URLs in parts of your website. In this article, I am going to explain the solution to this redirection issue from my personal experience. After following this guide you will be able to solve your issue but I will share my experience so maybe you can solve your error by following this guide. I will tell you the whole of the situations I faced and how I solved it.

A new client who wanted to shift his sites to Cyberhosting told us that one of his sites is facing redirection issues and he is not even able to gain access to the WordPress admin dashboard. Before telling you the whole store I will state some points which are maybe the cause of the redirection issues.

  1. Outdated Plugins
  2. Change URLs in the Databases
  3. Default themes files
  4. WordPress Files
  5. General settings URLs

I would like to start one by one the problems encountered and tell you how I solved the problems that I faced. Honestly, speaking that the main part is to find where is the problem. Once you get that 80% of the problem is solved (From my point of view may be in your case your view is different). Now I am going to tell you the whole story of problems and solutions with intervals 🙂 .

Infected Database Problem:

When i face this problem for the first time. It was very complicated at that point I was unable even to gain access to the WordPress admin dashborad. Its very tough to know the reason if your first problem is accessing the WP_ADMIN. In this case I decided on a brief check before going into deep analysis of files and searching for the problem there. One of our team members suggested to me to check the database and it was here in the WordPress setting that I discovered the URLS have been changed. So, your first question is where are the URLs in the database? I am going to tell you the way to check and solve the issue.

How to check and solve the Database issue:

First of all, you have to know where to access your database. If you are familiar with the PHPMyadmin in your control panel and know how to access then you can leave this part and access the database of your WordPress which you need to fix. Otherwise, stay with me and follow the guide. Here I will tell you how to access the database in CyberPanel. if you have any other panel go and search for the access process.

How to access database using PHPMyadmin in CyberPanel

Its very easy to access PHPMyadmin in CyberPanel. (Easy for me may be hard for you ). First of all go to the Database->PHPMyadmin.

solve the redirection error

You will see this screen which asks you to provide the credentials to login provide.

image 4

But what if you don’t have the credentials to log in. Actually, when I was investigating I also didn’t have the credentials to log in. But wait don’t worry I will tell you from where you can get the credentials to log in. Go to the file manager and edit the wp-config.php file here you can find the username and password to log in.
Once you logged into the PHPmyadmin go and find the table wp-options tables.

image 8

And check the home URL and site URL if they are not the same as your site and showing some else like me you have to replace these to your original site. I followed this process to solve the issue for the first time. I found it there and solved it using this process. Maybe in your case, the issue is different and you have to follow this guide to the end.

image 9

Default Theme files Issue

Again on that site after few days this issue happened again. First thing I did was to go back to the database and check the link but, surprise, everything is fine there. Now it’s a big task again to find the issue. I try to access the Admin dashboard of that WordPress site. and happy to know that it’s working. I logged in to the Dashboard and now begin to check other settings for or features, now you want to know-how.

How to check infected files through admin dashboard and resolve

I have the wordfence plugin installed on that site and I scan for intrusions. This scan took a long time to complete but the scan showed some high risk files in the default theme. I proceeded to remove the files from the scan and replaced these files with the default files for the theme. This resolved the issue and it is a solution that worked for me. But maybe in your case both solutions mentioned above do not work in which case go to next steps.

General Settings URL problem:

I found that after solving the problem with the database, as mentioned above, I was able to access the WordPress admin dashboard but after scanning the site using wordfence I was still unable to access the site. After checking the general setting of the website I found the URL of site had also been changed there.

I changed the URL of sites and after that it works. But I must say it is an extreme case. When your security is too low only then it will happen otherwise it is unlikely.

Unknown Problem (Plugins + database + files everything is changed)

I shared my experiences above about the problems that I faced on the site of client and how I solved this. But this is not it. After all these problems I still faced a final problem which took 2 days to resolve. The same client came back to us informing that his site had been hacked again. I wonder why his site had been breached yet again? But the first thing to do is to recover the site back to normal. I start working on his site I go for the database and check link links have again been changed so I use the method above to fix that, then I visited the site it’s still not working with the same redirect issue. Then I will do toward admin dashboard and start a scan, check the general settings and all that but the result is still different from the past. After doing all these I am still not able to get the site operating as normal. Then I decide first to know the reason of hacking site.

How to find the reason of hack:

There are some points that I followed to check site and maybe you cannot find the reason this way. But this is one method that you can try.

First of all I go to the plugins section of the client site and check. I discover that he has a lot of outdated plugins and most of them have available updates. I realise I have found the reason for the continued breach but what to do? how can I find the exact plugin which is insecure, changed or which is helping the hackers to breach the site. Wordfence was also not able to scan these files. May be there are a lot of infected files, too many for wordfence to report? I decide to go for a wpscan from my terminal.

Scan with wpscan

First I installed wpscan on my server and then go for the scan. I found that there are many infected files. His outdated plugins are infected. When I receive a result from terminal I go for those files and replace them with original one I got from the official sites of plugins. Or the files I already have for those plugins.

After the scan I replaced those file but not done with that I also replaced the wordpress file with original files. Let me explain exactly how to do this.

How to replace WordPress files with original files?

This is a tricky point and will be difficult for a beginner. First thing is to find you WordPress version.

Go to the file manager then public_html folder then wp-includes folder. Here you found a file name version.php. Open this file and you can see the version of WordPress that is installed.

Download the WordPress for this specific version from there official site click here to download. Download the version which is installed on your site.

image 7

After downloading upload this to your public_html folder of your site and replace it with your old files.

After doing all these i go to the site and check site is working.

Finally the problem has been resolved and I am happy to share my personal experiences on this with you guys. May be this will be helpful for you in order to solve your problem. Please let me know if you are able to solve your problem in comments. If this article didn’t help or you are unable to understand anything thing ask me.

Read More: HOW TO CHANGE TIMEZONE ON LINUX SERVER

Follow US on Facebook / Twitter  for update.

Migrate WordPress Site using Migrate Guru complete guide

Moving a website from one place to another place can be a difficult process. The main difficulty during this task is the risk of losing data. this article is about Migrate WordPress Site using Migrate Guru. WordPress is one of the most used CMS and the process of migrating a WordPress site from one place to another is now made easy with the use of different plugins and techniques. A WordPress website consists of files and a database, both of which need to be set up to talk to each other in the correct way.

Migrate Guru is a plugin that makes the migration of the site from one server to another very easy. Migrate Guru will transfer a site quickly, requires minimal knowledge. You did not need to worry about any database, data, and files loss. In this article, we mention Migrate WordPress Site using Migrate Guru

Table of Contents

  1. Installation Of Migrate Guru
  2. Migrate Guru Features
  3. Setup on Remote Server
  4. Move Website using Migrate Guru

Installation Of Migrate Guru

You can install Migrate Guru from the WordPress admin Dashboard, Plugin section. And also you can install it manually. We mention both methods below.

Install Automatically:

  1. Go to the Plugin section on WordPress admin Dashboard.
  2. Search the Migrate Guru in search box.
  3. Click the install button and activate to use.

Install Manually:

  1. Search Migrate Guru in any search engine or click here.
  2. On this page click Download button and download the zip of plugin
  3. Upload this plugin in plugins and active it.

Migrate Guru Features:

Fast One-click Migration

Using Migrate Guru you can move your site quickly and with one click. Let you have a 1GB of the site you can clone or migrate it less than 30 minutes. Just enter host details and click ‘Migrate’. If you entered the details right it will be done in just a few minutes.

Compatible with almost every Web Host

Migrate Guru has a large number of web Host option. Move your site from and to any web host.

Migrate WordPress Site using Migrate Guru

No Overload On Site

When you start the migration of your website the plugin will monitor the server resources ensuring that it does not overload until the site migration is completed.

Built For Large Sites

Migration Guru works for large sites. Move or clone sites as large as 200 GB in a breeze. Large site migrations usually fail because of live-site server import limits.

No Space Required

You do not need any extra space for migration. Migrate Guru automatically copies your site to our servers. After the migration is complete, the copy is erased.

Fully Automatic, Built-in Search

Comfortably handle serialised data with accurate Search & Replace.

Timely Alerts

Sit back. Relax. Our real-time & email alerts will keep you up to date with the website migrate status.

Setup On Remote Server

There are some steps to do on the remote server before doing migration.

Create your Site:

Before transferring the site first create the site on required server with the same name and credentials. Once your site is created move to next step.

Install WordPress

Install WordPress on the newly created website. Complete the setup of WordPress installation. Fellow the video guide to complete the setup.

Move Website using Migrate Guru:

Fellow the steps to move your site:

After installing Migration Guru plugin click on the migration guru in the left menu you can see dashboard

image 50

Provide Email and agree the agreement. After providing all information click on the Migrate button.

image 51

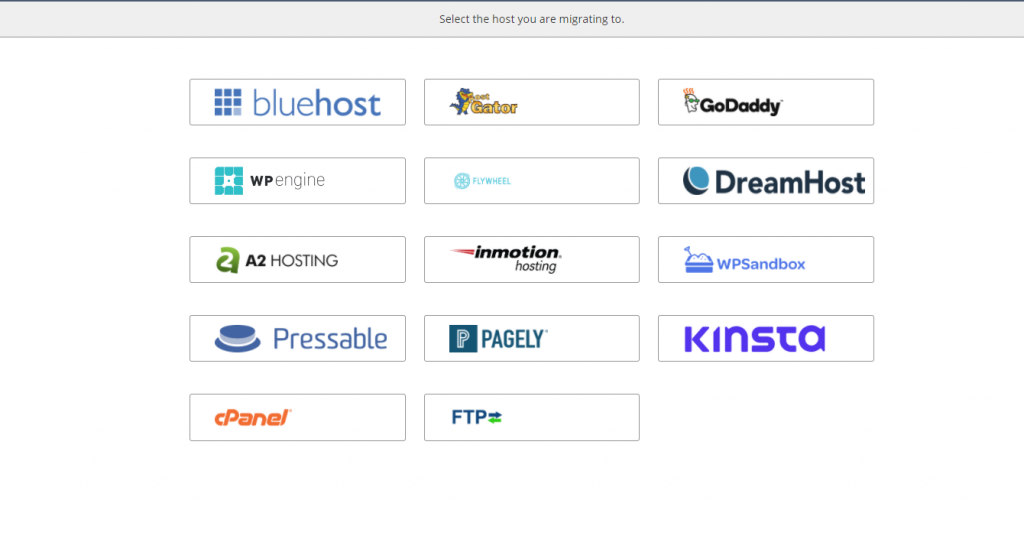
Select your host from all these host listed on the screen.

image 52

For this tutorial we are using FTP to transfer site. Provide the required information in the from.

image 54

After providing all this information click the migrate button.

image 55

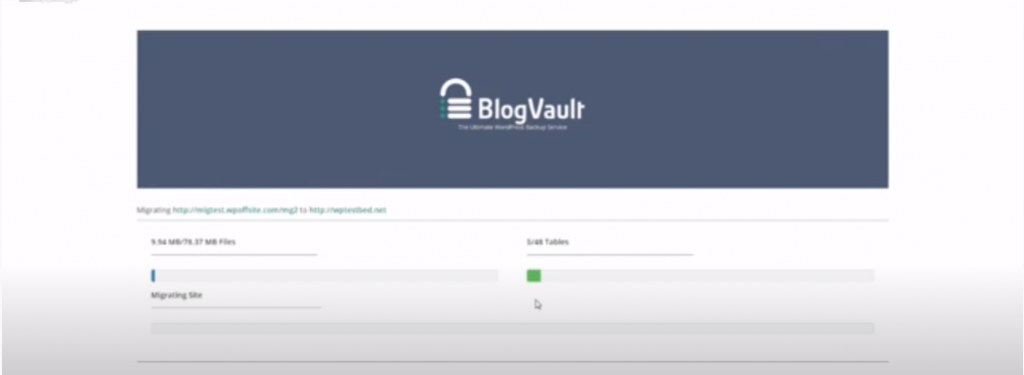
if all information is true you can see the migration process.

image 56

After successful migration of site you can see the screen showing success massage. and also you will receive a email regarding the completion.

image 57

How to change TimeZone On Linux server

The Time zone shows the standard time for a specific area or geographic region. How to change timezone on linux server is always a big question? The time zone is set when we install any operating system on our device or on our server. Timezone settings are one of the most important things to cover during installation because it impacts our system functionalities. There are many ways to change timezone on Linux server but the most used and easy way is to set using the command line.

In this article, we will discuss how to set or change timezone on a Linux server using the command line.

Table of Contents:

  1. How to Check the Current Time Zone
  2. Set/Change Timezone on Linux server Using Command line
  3. Confirm time zone change
  4. Importance of Time zone
  5. Things to remember

1. How to check Current Time Zone:

Before changing the time zone it is important to check the current time zone of your system. Linux system makes it easy to check the current time zone of your system by using the command “timedatectl“. It is available on all modern systemd-based Linux system.

To view the time zone follow the steps:

Open your Linux terminal and run timedatectl command on it

$ timedatectl
image 1

The output of the command shows the current timezone of the system. Now you can go for changes if you want to change the current time zone of your system.

Note: this step is not must for changing time zone you can do it after change this is just a good way. So if you have already your required time zone then there is no need to change.

2. Set/Change Timezone on Linux Server Using Command line

Once you check your current time zone and want to change. First you will need to find the specific name of the time zone you want to use. the specific name is like “Region/city“.

To List, the available time zone use timedatectl list-timezone command

$ timedatectl list-timezones
image 2

Now check the required time zone in the list and run the next command which is “sudo timedatectl set-timezone “you time zone” ” the last argument is the your specific time zone you want to set for your system.

sudo ” is used to run administrator rights or root user.

$ sudo timedatectl set-timezone <your specific time zone>

image 3

After running this command confirm time zone by running:

$ timedatectl
Change Timezone on Linux server

You can see the required time zone here after changing.

3. Importance of time zone

The time zone is very important for your system as many functionalities depends upon the time zone.

Every geographic part has its own specific time zone. Many things depend upon that like:

  • Access for system may be Bound to specific Time zone or Region.
  • If some record need to store in system it need that specific time zone.
  • In case of online server its important to set specific time zone its import from security point of view.

4. Things to remember

In the case of Linux server and database of site attached with that server. There are some issues which we suggest you to remember and check.

After changing time zone of your system you need to check your database if it is storing time and date.

If your database is storing old or wrong time and date. Then reboot your system it will fix your issue.

Reboot restart all services of your system and new time zone is ready to store in database.

Read More: HOW TO TRANSFER A WEBSITE FROM CPANEL TO CYBERPANEL MANUALLY

Follow US on Facebook / Twitter   for update.