How to change TimeZone On Linux server
The Time zone shows the standard time for a specific area or geographic region. How to change timezone on linux server is always a big question? The time zone is set when we install any operating system on our device or on our server. Timezone settings are one of the most important things to cover during installation because it impacts our system functionalities. There are many ways to change timezone on Linux server but the most used and easy way is to set using the command line.
In this article, we will discuss how to set or change timezone on a Linux server using the command line.
Table of Contents:
- How to Check the Current Time Zone
- Set/Change Timezone on Linux server Using Command line
- Confirm time zone change
- Importance of Time zone
- Things to remember
1. How to check Current Time Zone:
Before changing the time zone it is important to check the current time zone of your system. Linux system makes it easy to check the current time zone of your system by using the command “timedatectl“. It is available on all modern systemd-based Linux system.
To view the time zone follow the steps:
Open your Linux terminal and run timedatectl command on it
$ timedatectl

The output of the command shows the current timezone of the system. Now you can go for changes if you want to change the current time zone of your system.
Note: this step is not must for changing time zone you can do it after change this is just a good way. So if you have already your required time zone then there is no need to change.
2. Set/Change Timezone on Linux Server Using Command line
Once you check your current time zone and want to change. First you will need to find the specific name of the time zone you want to use. the specific name is like “Region/city“.
To List, the available time zone use timedatectl list-timezone command
$ timedatectl list-timezones

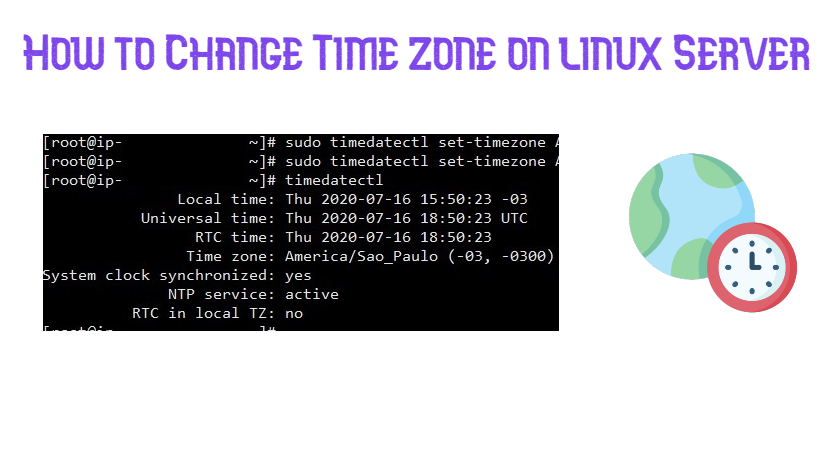
Now check the required time zone in the list and run the next command which is “sudo timedatectl set-timezone “you time zone” ” the last argument is the your specific time zone you want to set for your system.
“sudo ” is used to run administrator rights or root user.
$ sudo timedatectl set-timezone <your specific time zone>

After running this command confirm time zone by running:
$ timedatectl
You can see the required time zone here after changing.
3. Importance of time zone
The time zone is very important for your system as many functionalities depends upon the time zone.
Every geographic part has its own specific time zone. Many things depend upon that like:
- Access for system may be Bound to specific Time zone or Region.
- If some record need to store in system it need that specific time zone.
- In case of online server its important to set specific time zone its import from security point of view.
4. Things to remember
In the case of Linux server and database of site attached with that server. There are some issues which we suggest you to remember and check.
After changing time zone of your system you need to check your database if it is storing time and date.
If your database is storing old or wrong time and date. Then reboot your system it will fix your issue.
Reboot restart all services of your system and new time zone is ready to store in database.
Read More: HOW TO TRANSFER A WEBSITE FROM CPANEL TO CYBERPANEL MANUALLY